Most wrap conversations fixate on color and layout. They’re important, but longevity isn’t an art problem, it’s an engineering one. The reason some wraps still look sharp after five years while others fail in 18 months comes down to a stack of decisions: film type, adhesive chemistry, laminate choice, installation discipline, environment, and maintenance. When you understand how these pieces interact, you can spec smarter, care better, and get dramatically more value from every mile.
This deep dive explains, in plain English, what actually drives durability and what you can do about it, whether you’re wrapping one sedan or a mixed fleet of vans and box trucks.
1) Vinyl film 101: Cast vs. calendered (and why it matters)
There are two primary categories of wrap films:
Cast film
- How it’s made: Liquid vinyl cast in a thin layer, then baked.
- Behavior: Very stable; low “memory” (it doesn’t try to shrink back). Conforms to complex curves, rivets, and deep recesses with less tension.
- Best for: Full-coverage vehicle wraps, bumpers, compound curves, long-term installs.
Calendered film
- How it’s made: Extruded and rolled (like pasta) to final thickness.
- Behavior: Thicker, more budget-friendly, but higher “shrink memory.” Excels on flat or gently curved surfaces.
- Best for: Flat panels, short- to mid-term campaigns, walls and windows, simple shapes.
Specs to actually read on a data sheet:
- Thickness (mil): Thinner cast films often conform better; thicker isn’t always tougher.
- Elongation at break: How far a film can stretch before it fails. High is good, but overstretch will still imprint stress that shows up later as whitening or lift.
- Service temperature range: The temps the film can live in once installed.
- Minimum application temperature: Critical for winter installs, too cold and adhesives won’t wet out.
Rule of thumb: If your wrap has curves, recesses, or bumpers, spec cast. If it’s flat and short-term, premium calendered may be a smart savings.

2) Adhesive chemistry: It’s not just “stickiness”
Most wrap films use pressure-sensitive acrylic adhesives. Two variables matter:
- Initial tack vs. ultimate bond: Some adhesives start gentle (easy to reposition) and build strength over 24–72 hours. Others grab fast. Your installer chooses techniques accordingly.
- Air-release microchannels: Microscopic pathways in the adhesive help squeegee air out. They make clean installs faster and reduce “silvering” (tiny trapped-air sparkle) under panels.
Surface compatibility is huge:
- Factory paint is nearly always best.
- Fresh repaints need time to outgas solvents, installing too soon traps fumes, undermining bond.
- Low-surface-energy (LSE) plastics like certain textured bumpers can be tricky; you may need LSE-friendly adhesives, adhesion promoters, or design workarounds (leave the texture unwrapped; use color-matched paint on inserts).
- Contamination (silicone detailers, waxes, road film) will sabotage even the best adhesive. Proper prep is non-negotiable.
3) Laminates & topcoats: Your UV and scratch insurance
The printed film itself isn’t the whole story. A laminate is a clear protective layer that locks in color, provides abrasion resistance, and adds the finish you see (gloss, satin, or matte).
- Gloss is punchy and bright but can reflect glare.
- Matte hides minor surface imperfections but can mute colors and hold dirt if you use harsh soaps.
- Satin often strikes the best balance for legibility and maintenance.
Premium laminates include UV absorbers that slow color fade. Specialty options like anti-graffiti laminates resist markers and allow easier cleaning in high-touch urban environments.
What about ceramic/UV toppers?
Wrap-safe ceramic or polymer toppers add slickness so grime releases more easily and can boost UV resistance. The key is compatibility: use products labeled for vinyl wraps, not generic solvent-heavy waxes.
4) Environment: The north bay stress test
Even in Santa Rosa’s mild climate, wraps fight a daily physics battle. The big stressors:
- UV + thermal cycling: Sunny afternoons and cool nights cause expansion and contraction. Edges and curves feel it most.
- Moisture: Fog, dew, and rain work into any micro-lift, turning a tiny edge flaw into a dirt channel.
- Abrasives & chemistry: Road grit, construction dust, tree sap, and coastal spray punish lower panels and rear bumpers.
Mitigations that matter:
- Hand wash with pH-neutral shampoo; avoid brush tunnels and close-range pressure wands.
- Rinse lower panels and the rear bumper more often in wet months.
- Keep the rear CTA plate (the color block behind your phone/URL/QR) clean and high-contrast, winter’s early dusk steals legibility fast.
- If possible, park under cover or in shade. Breathable covers (not tarps) help during long layovers.
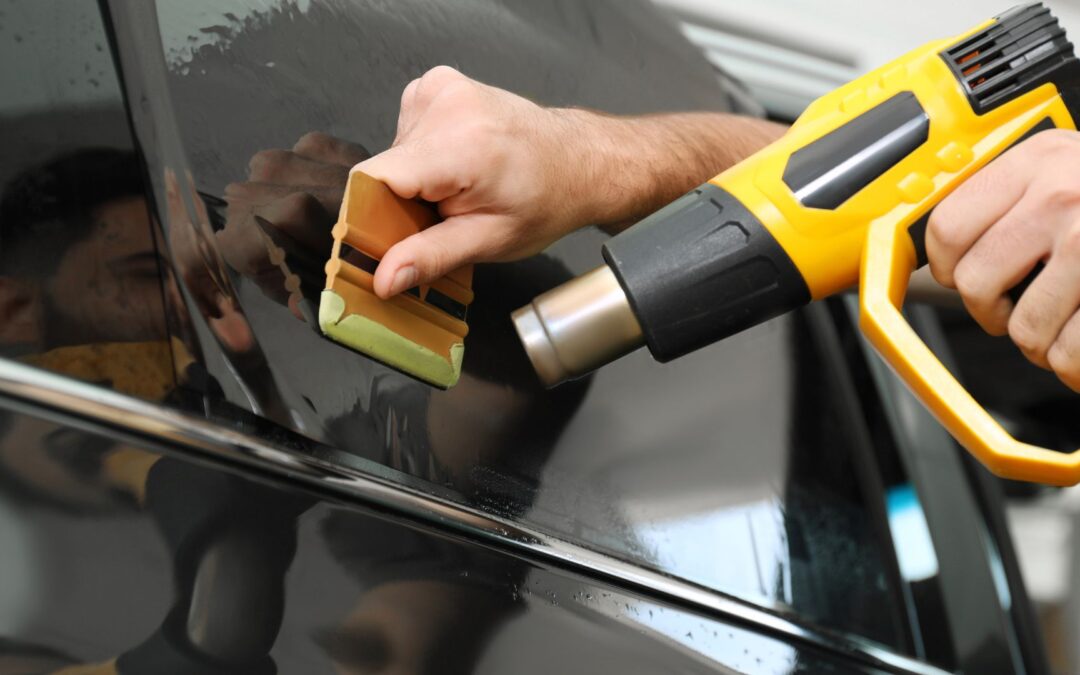
5) Installation discipline: The invisible half of durability
A flawless print can fail if the install cuts corners. Watch for these pro practices:
- Surface prep sequence: Degrease (bug/tar), remove residues, IPA wipe, lint-free final pass. The goal: a squeaky-clean, dry surface with no silicones.
- Application temps: Most films prefer a warm shop; cold panels resist bonding.
- Squeegee pressure & angle: Consistent, decisive strokes help the adhesive wet out.
- Post-heat on edges and recesses: Heating the vinyl to the manufacturer’s spec resets memory and reduces edge lift in curves. Skipping this is a top cause of early failure.
- Smart panel maps: Avoid running thin copy across door seams or deep body lines. Keep small text on flat fields and use art to cross tricky areas.
- Edge sealing (where needed): Certain spots benefit from a tiny bead of edge sealer or from finishing tapes; done right, this is nearly invisible and greatly improves longevity.

6) Failure modes & field diagnostics (What you’re seeing, why it happened, what to do)
- Edge lift: Film separates at door seams, wheel arches, or handles.
Likely causes: Contamination, insufficient post-heat, aggressive pressure-wash, or overstretch.
Fix: Clean, dry, and re-seal promptly; if contamination crept under, a small panel reprint is cheaper than letting it spread. - Tenting or bridging: Vinyl spans a recess without conforming, creating a tiny “bridge.”
Likely causes: Not enough heat/stretch sequence or installed too cold.
Fix: Localized rework with proper heat, sometimes a new piece. - Silvering: Micro air appears as sparkle under the film.
Likely causes: Weak squeegee pressure, aged adhesive, dust.
Fix: Often cosmetic; severe areas may need panel replacement. - Whitening on curves: Stretch marks where film was pulled beyond spec.
Fix: Replace the overstretched section; no cleaner will erase stress whitening. - Fading/chalking: UV beating up the pigment or laminate.
Fix: Future-proof with better laminate, wrap-safe topper, and shade parking when possible. - Adhesive ooze: Sticky residue at edges in heat.
Likely causes: Thermal stress, aggressive chemicals.
Fix: Clean gently; monitor for dirt accumulation; consider an edge clean-up and sealer.
7) Spec sheet decoder: What to look for (and what to ignore)
When you’re comparing films, laminates, and install quotes, ask for product data sheets and read them with these questions in mind:
- Film class: Cast vs. calendered? For complex vehicles, cast is worth the premium.
- Durability rating: Is the stated life for vertical exposure? (Horizontal surfaces like hoods and roofs always age faster.)
- Minimum application & service temps: Can your project be installed in your shop conditions?
- Adhesive type: Air-release? LSE compatibility needed?
- Colorfastness & gloss retention: Any manufacturer notes for specific hues (reds/yellows historically fade faster)?
- Laminate pairing: Is the laminate from the same system family? Matched systems often carry stronger warranties.
- Warranty and exclusions: What does it actually cover (material only, or labor too)? Are coastal or high-UV areas treated differently?
Ignore vague marketing claims. Focus on the stack: film + laminate + adhesive + the installer’s process.
8) Total cost of ownership (TCO): Why “cheap” often costs more
A budget film might save you 15–25% up front, but if it needs replacing 12–18 months earlier, or requires frequent touch-ups, you’ve paid more in real dollars and downtime.
A simple way to think about it:
- Annualized cost = (Wrap cost ÷ years of crisp, on-brand service)
- Real CPM (cost per thousand impressions) = Annualized cost ÷ (estimated annual impressions ÷ 1,000)
A wrap that lasts four to six years with consistent readability often beats two budget reprints, not just in spend, but in brand consistency and reduced vehicle downtime.
9) Maintenance reality: The 15 minutes that protect years of value
- Regular wash: pH-neutral soap, microfiber mitts, two-bucket method, straight-line motions.
- Dry immediately: Prevent water spots and freeze-bonded grime.
- Monthly 10-minute check:
- Edges and seams: No lift or grime lines
- Lower panels: Fresh rinse after storms
- Rear CTA plate: Digits/URL/QR spotless and high-contrast
- Tracking assets: Call-forwarding/URLs/QRs working
- Semiannual protection: Apply a wrap-safe UV/ceramic topper; do a noon/dusk photo audit from ~50 feet and fix contrast if the CTA sinks at either time.
- Winter protocol: Gentle de-icing (vinyl-safe), no metal scrapers on film, avoid close-range pressure wands.
Small habits, big lifespan.
10) Procurement checklist for buyers (Print this)
When you request quotes, ask vendors to answer these in writing:
- Film & laminate brands and product lines (cast vs. calendered; matched system?).
- Adhesive details (air-release, LSE compatibility if needed).
- Color management (do they proof on your vehicle color in daylight and dusk?).
- Seam map & panel plan (where will seams land; how will copy avoid them?).
- Install environment (temperature-controlled, dust-managed shop?).
- Post-heat process (edge temperatures and technique used).
- Edge sealing strategy (where, and with what product).
- Warranty (material vs. labor, vertical vs. horizontal surfaces).
- Care kit provided (pH-neutral soap recommendation, microfiber count, topper guidance).
- Modular CTA overlays (so you can update phone/URL/QR without reprinting large panels).
A qualified partner will welcome these questions, they protect both of you.

The Bottom Line
Wrap durability is the sum of smart specs, clean surfaces, disciplined installation, realistic expectations about environment, and simple maintenance. Choose a film/laminate stack that matches your body geometry and service life, insist on a thoughtful seam map and proper post-heat, and treat your wrap like the 24/7 brand asset it is. Do that, and your vehicles won’t just look great longer, they’ll perform longer, delivering lower real CPM and a steadier pipeline of calls, scans, and bookings.
Want a spec you can trust, and a wrap built to last?
Bring your vehicle make/model (or fleet list), typical routes, and any history of wrap issues. We’ll recommend a film/laminate/adhesive stack, map seams around your body lines, and install in a controlled environment. We’ll also set you up with modular CTA overlays and a simple maintenance plan so your wrap stays crisp in every season.
TNT Signs and Graphics
📍 1042 Hopper Avenue 3-F, Santa Rosa, CA 95403
📞 (707) 528-8523
🌐 www.signservant.com