A vehicle wrap isn’t just a cool paint alternative, it’s a full-fledged marketing asset with a life cycle you can plan, manage, and measure. When you approach wraps strategically, from the first sketch to the day you remove the vinyl, you lower total cost of ownership, protect your factory paint, and squeeze more leads out of every mile.
This guide walks you through each phase of the wrap lifecycle, with practical tips you can put to work immediately. Whether you’re wrapping one service van or standardizing an entire fleet, you’ll learn how to make smarter decisions that pay off in visibility, durability, and ROI.
1) Strategy First: Define What “Success” Looks Like
Before anyone opens design software, lock down the answers to three questions:
Who are you trying to reach?
Name the neighborhoods, corridors, and event types your vehicles frequent. A van that idles in school pickup lines needs different messaging than a truck that cruises highway corridors at 65 mph.
What action should viewers take?
Pick one primary CTA (call, visit, scan, or tap). Every extra request dilutes response. “Call now” and a big phone number is different from “Scan to book.”
How will you measure it?
Assign a unique phone number, vanity URL, QR code, or NFC tag to the wrap. When leads arrive, you’ll know exactly where they came from.
Pro tip: If you manage multiple vehicles, give each one its own trackable phone number or UTM-tagged URL. That way you can pinpoint which routes, designs, and drivers generate the most engagement.

2) Design That Works at 5, 25, and 55 MPH
Great wrap design isn’t about stuffing the most content onto a panel, it’s about clarity in motion.
Use a strict visual hierarchy
- Primary: Brand name/logo, largest element, read at a glance.
- Secondary: What you do (e.g., “Emergency HVAC • 24/7”).
- Tertiary: One CTA (phone, URL, QR).
Keep copy tight
Aim for 10–12 words total on the sides. At speed, your audience gets a couple seconds max.
Prioritize contrast
Light text on dark fields (or vice versa) outperforms tone-on-tone styles. Test in daylight and shade; avoid combinations that “vibrate” (like saturated red on blue).
Respect the vehicle
Don’t run small text across door gaps, body creases, or handles. Use those areas for background color, patterns, or imagery, reserve flat fields for your message.
Rear real estate = conversion zone
Traffic sits behind you. Put the phone number, URL, and QR/NFC here at eye level, with generous negative space so it pops in a mirror or a quick glance.
3) Materials Matter: Films, Laminates, and Why “Premium” Pays Back
Not all vinyl is the same. Choosing the right stack affects installation time, longevity, and how the wrap looks in year three.
Cast vs. calendared film
- Cast vinyl conforms to complex curves, resists shrinkage, and lasts longer, ideal for full wraps and shaped panels.
- Calendared vinyl is budget-friendly and fine for flat areas, spot graphics, and short-term promos.
Finish options (and when to use them)
- Gloss: Bright, high-pop color and easy cleaning, great for most service brands.
- Satin: Modern look with less glare; hides minor dust better.
- Matte: Sophisticated but shows marks more readily; best paired with disciplined maintenance.
Laminates are your shield
A UV-resistant laminate adds scratch resistance and slows fade. For heavy use (work sites, dense urban parking), consider anti-graffiti or ceramic-compatible top coats.
Cost reality check: Economy films can look fine on day one but cost more in reworks and downtime. Over three to five years, premium materials often win on total cost of ownership.

4) Print Profiling & Color Accuracy: What You Approve Is What You Get
Consistency across a fleet lives or dies on color management.
- Device-linked profiles: Your brand colors should be profiled for the specific printer/ink/film combo, don’t accept “close enough.”
- Scaled proofs: Approve proofs at scale or on full-size swatches placed on your actual vehicle to confirm legibility and surface reaction under sun and shade.
- Template precision: Artwork should be set on your vehicle’s exact year/make/model template. A ½-inch off on screen can be painfully obvious on a slider seam.
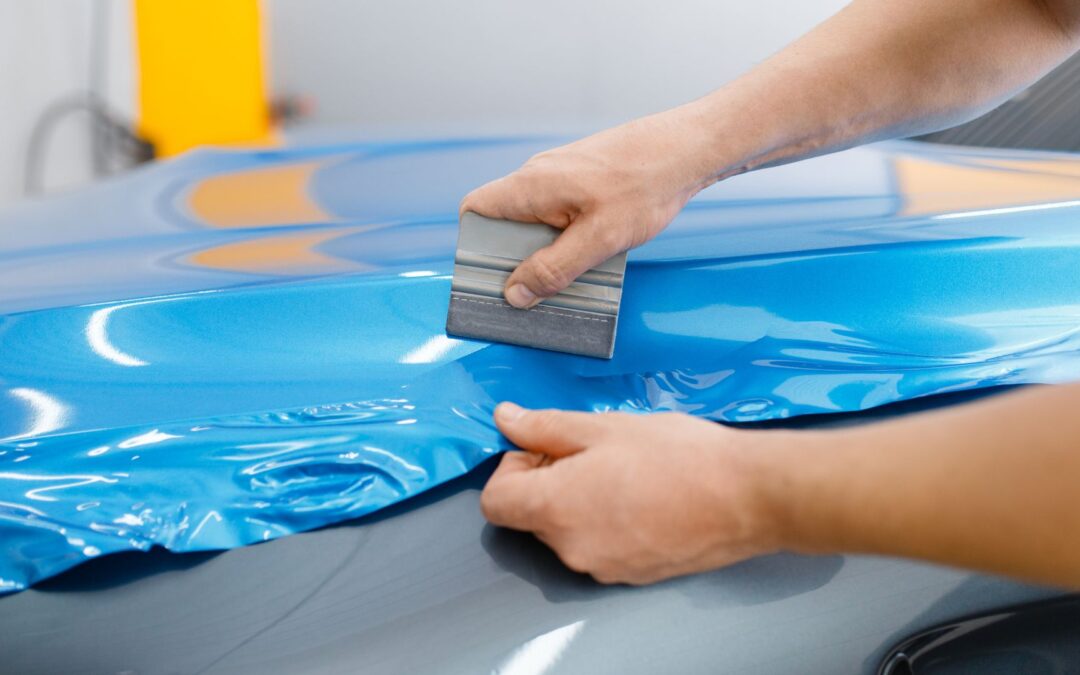
5) Professional Installation: Where Most Failures Start (or Are Prevented)
A wrap succeeds or fails in the bay. Look for these signs of a shop that respects the craft:
Surface prep
Thorough decontamination (removing waxes, silicones, road film) is non-negotiable. Miss this and adhesion fails.
Panel planning
Installers should heat-form curves without excessive stretch, minimize seams, and avoid running critical text across high-move edges.
Edge finishing
Proper heat-setting and edge sealing prevents early lift. Ask to see the edge-seal product and the installer’s heat map/temperature controls.
Quality check
A real walk-through includes seam review, bubble scan under raking light, and verification that sliders and fuel doors operate cleanly without binding film.
Downtime tip: An organized shop will pre-print and stage panels before your drop-off, minimizing time off the road. Many full wraps can be turned in about three days once artwork is approved.
6) Maintenance That Actually Extends Lifespan
Treat the wrap like a protective skin over your paint.
Washing
- Hand-wash only with pH-neutral soap and a microfiber mitt.
- Avoid brush tunnels and high-pressure wands near edges.
- Blot dry with edgeless microfibers to reduce micro-marring.
Spot emergencies
Deal with bird droppings, bug guts, and tree sap within 24 hours. Use vinyl-safe cleaners or isopropyl alcohol (diluted), then rinse.
UV care
Apply a wrap-safe spray sealant or ceramic topper every 3–6 months to boost hydrophobic behavior and slow UV fade.
Routine inspections
Monthly edge checks catch small lifts before water gets in. Quick pro touch-ups are far cheaper than panel replants.
7) Smart Modularity: Update Messaging Without Rewrapping the Vehicle
The most expensive wrap is the one you replace early because one line changed.
Modular CTA strips
Print your phone/URL/QR on a separate overlay panel. When numbers or campaigns change, swap the strip, not the side.
Promo windows
Reserve a “promo zone” for seasonal decals with removable adhesive. Your base brand graphics stay untouched.
Compliance knockouts
Leave a dedicated knockout for license numbers, contractor IDs, or DOT markings, easy to update as regulations or licenses change.
NFC/QR patches
Keep scannables as independent patches so you can rotate URLs or landing pages without reprinting large panels.
8) Measuring ROI: If You Can’t Track It, You Can’t Improve It
Trackable assets
- Unique phone number for the wrap (call-tracking platform).
- Vanity URL with UTM tags (Google Analytics).
- Dynamic QR codes with scan analytics.
- NFC tags for tap-to-book or tap-to-get-estimate.
Operational tie-ins
Ask new callers, “Where did you hear about us?” Include “Saw your vehicle” as an option. Log that in your CRM to see close rates by source.
Optimize quarterly
Review which vehicles, routes, and designs produce the most inbound actions. Rotate top-performing elements fleet-wide; retire what underperforms.
9) Removal & Resale: The Last 10% That Saves You Thousands
Done right, removal reveals pristine factory paint, a resale advantage many owners overlook.
- Warm panels, patient technique: Experienced installers heat and lift carefully to avoid adhesive residue or clear-coat stress.
- Adhesive cleanup: Any residual adhesive is removed with vinyl-safe solvents, followed by a paint-safe wash and inspection.
- Timing: Don’t wait until the film is badly degraded; older film can harden and complicate removal.
A Real-World Workflow (What It Looks Like with a Pro Shop)
- Consult & route mapping – Clarify audience, routes, and primary CTA.
- Design & mockups – Approve scaled visuals on your exact vehicle template.
- Material selection – Choose films/laminates for your use case (curves, sun, abrasion).
- Print & profiling – Color-managed output; panel kits staged by section.
- Installation – Surface prep, controlled environment, edge sealing, final inspection.
- Care handoff – Written maintenance plan, approved products, and quick-fix guide.
- Tracking stack – Dedicated number/URL/QR/NFC set up with dashboards.
- Quarterly review – Performance audit, modular updates, minor repairs.
- End-of-life – Clean removal and (if desired) trade-in prep.

Why Choose a One-Stop Partner
Managing multiple vendors (designer here, printer there, installer somewhere else) adds time, cost, and risk. A one-stop shop aligns design, production, installation, and maintenance, so your wrap looks right, lasts longer, and is easier to update. You also get consistent color across vehicles and faster turnarounds when you scale.
The Bottom Line
A vehicle wrap is a marketing asset with a clear beginning, middle, and end. When you plan each stage, strategy, design, materials, installation, maintenance, tracking, and removal, you turn a pretty graphic into a predictable, measurable growth engine. You’ll spend less over the life of the wrap, protect your paint, and convert more casual glances into real leads.
Ready to Build a Wrap that Works Hard for Years?
Bring your vehicle (or fleet shortlist) and your goals. We’ll mock up designs, recommend the right film/laminate stack, plan modular updates, and set up tracking so you can measure results from day one.
TNT Signs and Graphics
📍 1042 Hopper Avenue 3-F, Santa Rosa, CA 95403
📞 (707) 528-8523
🌐 signservant.com
Let’s turn your daily routes into your best-performing ad channel, start to finish.